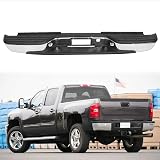
The rear bumper of your vehicle is not just a piece of metal; it plays a crucial role in protecting your truck from damage and ensuring your safety on the road. If you own a 2006 Chevy Silverado and need to install a new rear bumper, you may be wondering where to start. This guide will walk you through the entire installation process, offer tips, and provide insights to help you complete the task efficiently.
Understanding the Importance of a Rear Bumper
The rear bumper serves several key purposes:
- Protection: It absorbs impact in the event of a collision, protecting vital components of the truck.
- Structural Integrity: A properly installed bumper maintains the structural integrity of your vehicle.
- Compliance: It meets safety regulations set by various authorities, ensuring that your vehicle is roadworthy.
- Aesthetic Appeal: A good-looking bumper enhances the overall appearance of your Chevy Silverado.
Given its importance, ensuring that you install your rear bumper correctly is critical for both safety and functionality.
Materials and Tools Required

Before diving into the installation process, you must gather the necessary materials and tools:
- Tools:
- Socket wrench set
- Screwdriver set
- Torque wrench
- Wire cutters (in case you need to adjust wiring)
- Pry bar (optional, for stubborn parts)
- Materials:
- New rear bumper (ensure it’s compatible with the 2006 Chevy Silverado)
- Mounting brackets (if not included with the bumper)
- New bolts and washers (if old ones are worn out)
- Paint or rust-proofing spray (optional, for aesthetic appeal)
Steps to Install the Rear Bumper

Now that you have all the tools and materials ready, follow these steps to install your new rear bumper:
1. Prepare Your Vehicle
Before you start the installation, make sure your vehicle is parked on a flat surface and the engine is turned off. It’s also advisable to disconnect the battery to avoid any electrical mishaps during the process.
2. Remove the Old Bumper

To remove the existing bumper, follow these sub-steps:
- Locate the bolts securing the bumper to the frame of the truck. These are usually found at the ends of the bumper.
- Using your socket wrench, carefully unscrew each bolt. Keep them in a safe place, as you may need to reuse them.
- If the bumper has any electrical connections (like lights), disconnect them gently.
- Once all bolts and connections are removed, carefully pull the bumper away from the vehicle. It may require a little force if it has been on for a long time.
3. Inspect and Clean the Mounting Area
With the old bumper removed, take a moment to inspect the mounting area for any rust or damage. If you notice any issues, address them before proceeding. Cleaning the area ensures a better fit for the new bumper.
4. Prepare the New Bumper
Before installation, check that your new bumper is in good condition and that all necessary components, like brackets and bolts, are included. If you want, now is a good time to paint or apply rust-proofing to the bumper for added durability.
5. Install the New Bumper

Now it’s time to install the new bumper:
- Align the bumper with the mounting holes on the vehicle’s frame. It may help to have a friend assist you with this step.
- Secure the bumper by inserting the bolts into the mounting holes. Start by hand-tightening them to ensure everything is aligned correctly.
- Once the bumper is aligned, use a torque wrench to tighten the bolts to the manufacturer’s specifications (consult your vehicle’s manual for the correct torque settings).
- If your bumper has electrical components, reconnect them carefully.
6. Test the Installation
After the installation, give the bumper a gentle shake to ensure it is securely attached. Check that all lights function properly, and ensure the bumper does not obstruct any sensors or mechanisms.
Common Mistakes to Avoid
When installing a rear bumper, it’s essential to steer clear of common pitfalls that could lead to issues down the line:
- Neglecting to Read the Instructions: Always refer to the manufacturer’s instructions for specific guidelines.
- Using the Wrong Tools: Ensure you have the right tools to avoid damaging parts during installation.
- Over-tightening Bolts: This can strip threads or crack the bumper. Use a torque wrench for accuracy.
- Skipping the Electrical Check: Failing to check lights and connections can lead to malfunctions later.
Case Study: Real-Life Installation Experience

A local Chevy Silverado owner, James, decided to install a rear bumper on his 2006 model after a minor collision. He documented his experience on an automotive forum. Here are some key takeaways from his experience:
- James emphasized the importance of having a second person to help align the bumper during installation.
- He noted that he encountered rust on the mounting area, which he addressed with a rust remover before installing the new bumper.
- He recommended taking your time and not rushing through the process, which ensured a more thorough and correct installation.
Installing a rear bumper on your 2006 Chevy Silverado is a manageable DIY project that can save you money and ensure your vehicle is protected and looking good. By following the steps outlined in this guide, preparing adequately, and avoiding common mistakes, you can accomplish the task successfully.
Remember to take your time, consult your vehicle’s manual, and consider reaching out for help if needed. With patience and the right tools, you’ll have your new bumper installed and ready for the road in no time. Whether for safety, functionality, or aesthetics, proper installation is key to maintaining the integrity of your Chevy Silverado.


