

My oldest is turning 6, and he’s still in a toddler bed. He never complained it was too small and I just wasn’t ready to take the next step. My boys share a room and it was still a nursery up until now.
When I was pregnant with Xander, we waited until he was born to find out that we were welcoming a baby boy. We put his nursery together in the first few months while he slept in a cradle in my room. My mother helped me design custom curtains and reupholster a matching rocking chair. The furniture in their room has moved around quite a bit in order to accommodate adding another crib for Bradyn when he was born. Later, their cribs turned to toddler beds which were placed on either side of their room. Upgrading out of toddler beds meant they truly weren’t babies anymore, which I was having trouble accepting.


Even with all the extra room for “activites”, bunk beds tend to make me nervous. I’ve just heard about too many stories involving broken bones and bunk beds. So I waited until Xander was six because that is the recommended age to sleep on the top bunk.
So now he is six! It was finally time to upgrade their room. I decided to surprise Xander for his birthday. He knew nothing about the makeover. I worked on their bedroom projects at night so they never saw any of the components. We arranged for them to stay over my mother’s house while my cousin Becca and I finally put their room together.
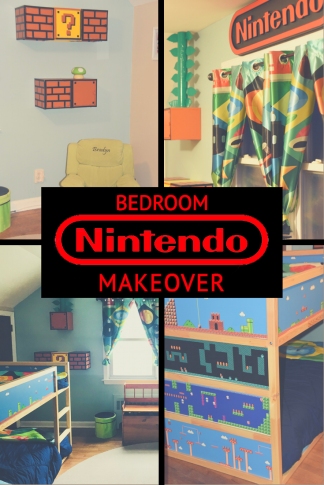
I chose a Mario Brother themed room because my boys are totally in love with video games. I thought it would be fun and colorful to decorate a classic Nintendo themed room. I quickly learned however, that there wasn’t much out there to purchase in the classic Nintendo style so I began piecing together my own decor.
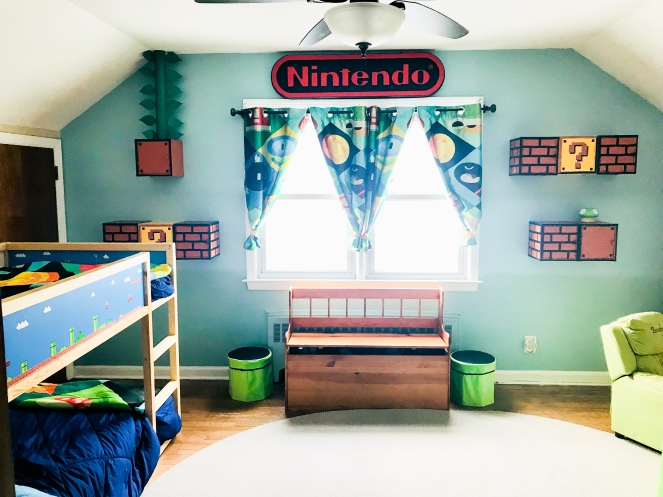
The bunk beds were purchased as a big birthday gift for both boys from my mom. It is the Kura brand loft bed from Ikea. https://goo.gl/t4PEFo I am really happy with the sturdiness and height of this bed. The bottom bunk is on the floor so as far as bunk beds go, it’s not very high at all. I designed classic Nintendo graphics and had large decals printed to fit on the Kura bunk bed. The long side of the bed (with a ladder) is 63″x 9.25 and each piece on the short side is 35.45″ x 9.25″. The result was a beautiful Nintendo style bed.


The cabinets were also from Ikea. https://goo.gl/vz3mAo 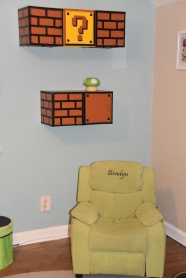 They are called Lixhult cabinets, they are 10″X 10″ and made of metal. I decided to laminate these cabinets to make them look like Nintendo Blocks. However, I think you could also try spray painting them to achieve the same look. I laminated each side of the cabinet before I put it together. I used my die cutting machine for the decals but if you don’t have a die cutting machine, you can use black electrical tape for the brick boxes and a stencil to cut out the question marks on the coin boxes. I made a tutorial video so everyone can see how they were made:
The good news is Ikea makes a yellow Lixhult cabinet and you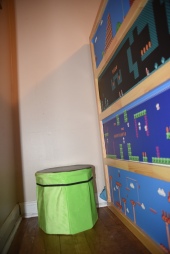 can skip right to decorating your coin blocks with question marks if the Ikea near you sells this color. Unfortunately they do not ship the yellow cabinet so I had to make mine.
The green storage boxes were made from these lime ottoman boxes I bought off amazon. https://goo.gl/MXvmqh I used my heat press to cover the lime decoration on the lid with a big black circle. If you don’t have a heat press, you can still use HTV vinyl and iron it on. I will be adding a tutorial video for the pipe boxes as well.
The rest of the room came together with curtains, a rug, and throw blankets, that were ordered off an E-bay store called: https://goo.gl/EfhaxU These items were custom printed and took a while to come but luckily I started ordering two months in advance and everything ended up coming just in time.


The knobs were custom painted by an Etsy store and we actually happened to already own a giant Nintendo sign that was hanging in my husband’s man cave.
Some other added touches were a “Brother’s Work Together” wall decal. I also customized the back of their recliner chairs with their names and mushroom silhouettes. The boys also have two metal RÅSKOG carts from ikea. For his birthday Xander was given some fun Mario magnets and these were the perfect combo for creating fun nintendo boards.


The room came together and I am so proud of it. I dragged my feet because I didn’t want to let go of their nursery, but in the end we had a lot of fun decorating it and they boys are extremely happy with their new room.
The boy’s room was featured on IKEA Hackers
https://www.ikeahackers.net/2018/05/nintendo-cabinet-room-makeover.html

This is amazing! Thanks for making a tutorial! My son, who is also named Braeden and will be turning 6 soon, wants a Mario room too. I plan to use the same supplies with the exception of the die-cut machine, to make the blocks. I was wondering though, how did you make the vine?
Thanks!
LikeLike
Thank you❤️. It is made from a thick cardboard tube covered in green vinyl.
LikeLike
Would you ever consider selling the completed cabinets? I’d be willing to buy some, but I am not crafty at all! It’s amazing how talented you are, the room looks great!
LikeLike
Thank you so much ❤️. I have an Etsy shop called Picture So Perfect. Message me there if you are ever interested. I predict shipping the cabinets to me from Ikea and then the finished cabinet to you might get pricey. But I can price it out 🙂
LikeLike
Wonderful room! I’m inspired! We hand the same bed and would LOVE those printed decals for the bed panels! Please share the source
LikeLike
I got the decal for the bed from a seller on Etsy. Their shop seams to be gone now. But if you search on Etsy for decals for IKEA Kura bed, you’ll find a bunch of sellers that make them. I sent them my own custom design and they printed it and made the decal for me.
LikeLike
Would you ever consider sharing the cut file for the cabinets?
LikeLike
Sure! Email me fancifas@aol.com. I’m happy to share
LikeLike
What color brown did you use for the boxes
LikeLike
I used NUT BROWN
ORACAL 631 Adhesive Vinyl, 12″ x 6′, Nut Brown 6 Feet https://www.amazon.com/dp/B06XRKY85S/ref=cm_sw_r_cp_api_glt_fabc_HZ94VNK8KV1PD5Q9ANN9?_encoding=UTF8&psc=1
LikeLike
What file did you use for the cricut? Can you give us measurements I can’t seem to get the brick outline the black correct
LikeLike
Hi Stephanie,
I didn’t used a circuit, I used a silhouette machine.
I believe the files are different. To make it, I took a picture off Google of the Nintendo blocks and then measured it the exact size of the IKEA cabinet. I hope this helps
Tracy
LikeLike