

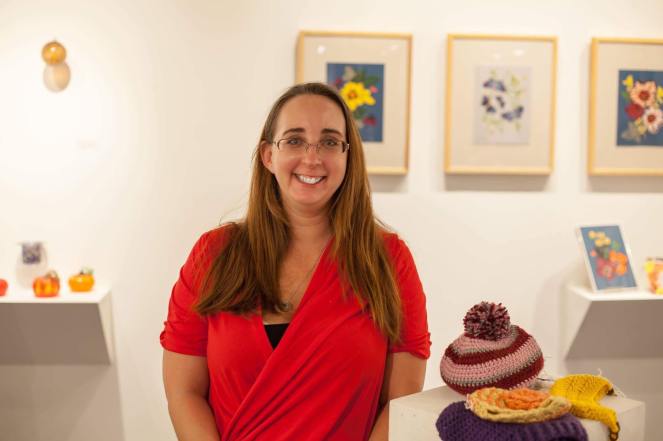
I was fortunate enough to be shown at the Pelham Art Center for the Craft Marketplace: An Exhibition and Sale of the Handmade. I never in my wildest dreams would have imagined that I would be an artist being shown in an art exhibit. Let this be a lesson to us all – your life can take many twists and turns and can be so fantastically surprising so never shackle yourself in a box. Always try new things and don’t be afraid to take risks. Talk to everyone around you because you never know where a new friendship will take you. 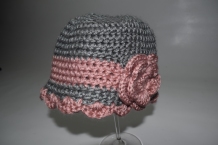 Anyhow, I digress….I had to make a lot of hats for the show and one of them in particular has gotten lots of attention. Its a cute little hat that I made in 0-3 months originally but everyone seems to want it in adult size. (I am more than happy to oblige)
While at our Holiday Boutique at the New Lebanon Elementary School in Greenwich, CT this past December some of Tracy’s family stopped by to support us. One of the daughters fell in love with this hat. So of course I am making it for her! I am going to take this opportunity now to tell you how I size my hats and how you can size virtually any hat you want to be any size you want. I am only slightly obsessed with Pinterest and one day while I was just scrolling through I found this nice little men’s striped beanie over at Petals to Picots.
I was shocked when I found that Kara had a link to a hat sizing diagram that Cyndi Byars created. I printed it out and laminated it and I have been using it ever since. It literally changed my crochet life. There are so many things that I love but I don’t necessarily want it in the size that the pattern is written in. Now this only works for top down hats, but I am pretty sure some one has figured out a guide for bottom up. Which I have just not thought to search for yet, and that is now on my mental to-do list. I have come across handy guides for bonnets too.. which will be mentioned in a future post.
Though I didn’t actually make that hat in the end….ever… I just used her formula for making hats and the hat sizing chart and came up with a bunch of my own ideas. If you would like to see those hats I recommend either looking at Amy’s Tangled Dreams on Facebook or on Instagram. Any of the ones that have this similar shape and stripes are derived from that formula.
ANYHOW….
The trick is..
Make a Magic Circle – put 8 half double crochets (8 HDC) into it and slip stitch (sl) to close. Pull the tail tight.
Round 1 – Put 2 half double crochets (2 HDC) into each stitch (16 stitches) -don’t put a slip stitch into the first HDC of the row because then you will get this funky seam going down the back of your hat. If you just HDC into the first one – it will look and feel a little strange at first but just trust me on this one – you will have a seamless hat.
This only works for single colors. If you are going to do stripes you need to put two slip stitches into the following 2 HDC’s and then add your second color in and just start doing HDC’s again. This will make your stripes be perfectly straight. Again, this will look a little weird until you weave in your ends and pull things tight but it works. I haven’t done it for single row stripes yet so there may be another trick for that.
Round 2 – [2 HDC in one stitch, 1 HDC in the next] around (I like to use a stitch marker in the last HDC of each round and move it every time I am done with a round just so that I know where my rounds actually started and so that when I do feel like adding another color I know where to put the 2 slip stitches in)
Round 3 [2 HDC in one stitch, 1 HDC in next two stitches] around
Round 4 [2 HDC in once stitch, 1 HDC in next three stitches] around
and again and again and again until your little circle matches up to the desired sized circle on Cyndi’s wonderful hat sizing diagram.
Then once you have the crown size to the desired size you just HDC around and around and around until you have the correct length for the crown size you chose. Easy Peasy! If I am going to add a second color I kinda just guess where I want it to be. In my head I imagine what my color scheme would be. (I know that is rather unsettling to some. Kinda like my cooking is unsettling to my husband when I am trying to teach him how to make something and I say you know just eye-ball this spice and taste it and don’t even use a measuring spoon cause I just tap the jar all around the pan… yeah that goes over real well…) With this hat I wanted a large portion to be the main color, a thick band of the secondary color, a thin little band of the main color and a scallop stitch edging in the secondary color.

Okay so spoiler alert – I like SALES – and I have learned that Joann’s has a big yarn sale in August and January and I like Caron Simply Soft yarns a lot. There is currently a sale going on now at Joann’s (yes, I just ordered more yarn 1.9.17) and they have a code for $4.99 shipping on your order and Caron Simply Soft, Lion Brand Wool-Ease Thick and Quick and Lion Brand Vanna’s Choice yarns are all on sale -yippee- cause I actually have a few orders that I needed to get these brands for. I will be making each product into a post so fear not you will see what is coming 🙂
So when I originally made the 0-3 month version I had seen a hat similar on Pinterest or on the web somewhere and I had just gotten a big box full of different colors because well it was the end of the summer and I was not about to let that sale pass up. Well I apparently accidentally ordered 4 skeins of this pink called Antique Rose. Now I will be honest, I am not a huge fan of the color. I am not a huge pink person and its kind of a grey pink. Well I had ordered the Soft Grey Heather and when the two are put together some real magic happens. As you can see below.
Now if you are going to replicate this hat you may have to play with your scallop vs your little main color band. I totally cheated. I had this hat made in 0-3 months so I picked that hat up and measured my scallop edge and used my fingers as a guesstimate guide to figure out how many rows I needed for the grey band.
An interesting fact I have learned is that babies and toddlers/preschoolers HATE and I mean HATE anything that is tight and restricting… so I leave all of my hats for the younger crowd loose at the bottom. Now as for us adults, we like our hats to be a little snug on our heads. I typically drop down 2 hooks sizes from the recommended hook size for the yarn for the bottom of the hat. So for Lucy’s hat I dropped to a G hook halfway through that small grey band and then continued using it for the scallop edge. I put it on and its perfectly snug.
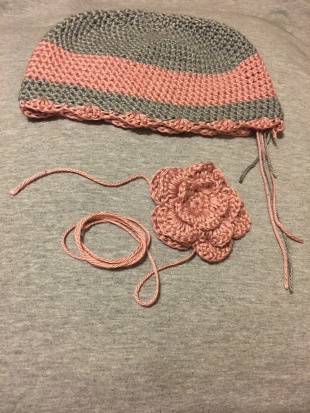
The flower …
You can’t forget the flower! I found this little beauty over at Free Crochet Patterns and Designs by LisaAuch. Because this hat is so much larger than the 0-3 month size the pink band is much bigger. So instead of using my H hook as is recommended for Caron Simply Soft I sized up to an I hook. The flower is the literally the perfect scale for the hat. I cannot wait to give this lovely hat to the lucky Miss Lucy!

Pssstttt…..
If you want a tighter hat, use the single crochet stitch (sc). You want a of an open weave texture do a double crochet stitch (DC). I have used this method for cluster stitches and puff stitches and it works great. Though for the cluster and puff stitch I am finding that because the height of the stitch is so high instead of being a 6-9 month hat you should call it a 6-12 month hat and then I would recommend doing the length of the 12 month hat for the little bit bigger than 6 month circumference.
~Amy
